So, I just applied Plasti Dip to my stock GT Sport rims. I have to say, I think it looks FANTASTIC! It's exactly the look I was trying to achieve.
Other Plasti Dip adopters will attest that this product is very durable. Here is a rundown and pictorial:
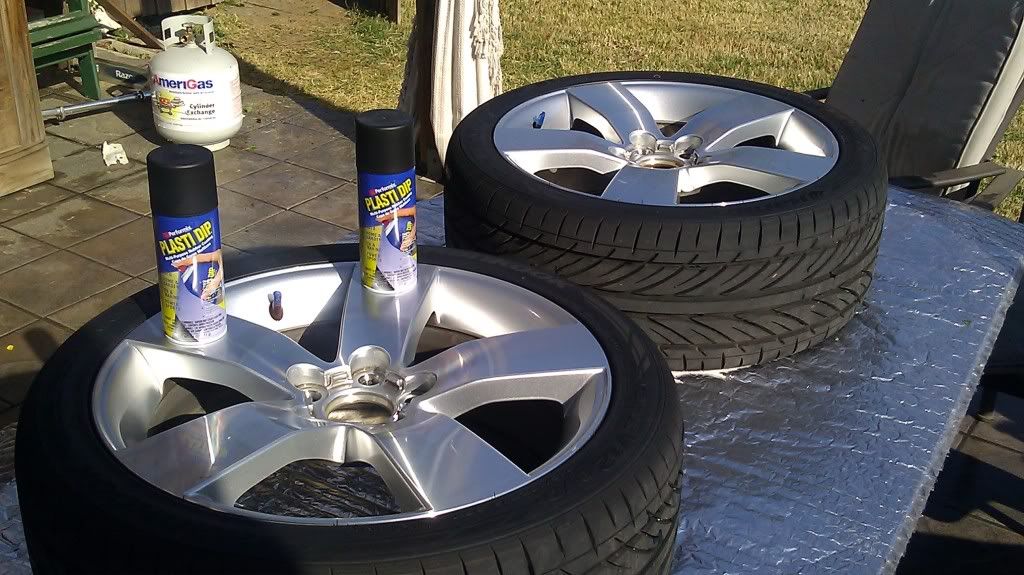
1. Home Depot/Lowes/Ace: I used four cans of aerosol flat black Plasti Dip. Total cost: $26.00 for all four cans, and 1$ for two packages of index cards.
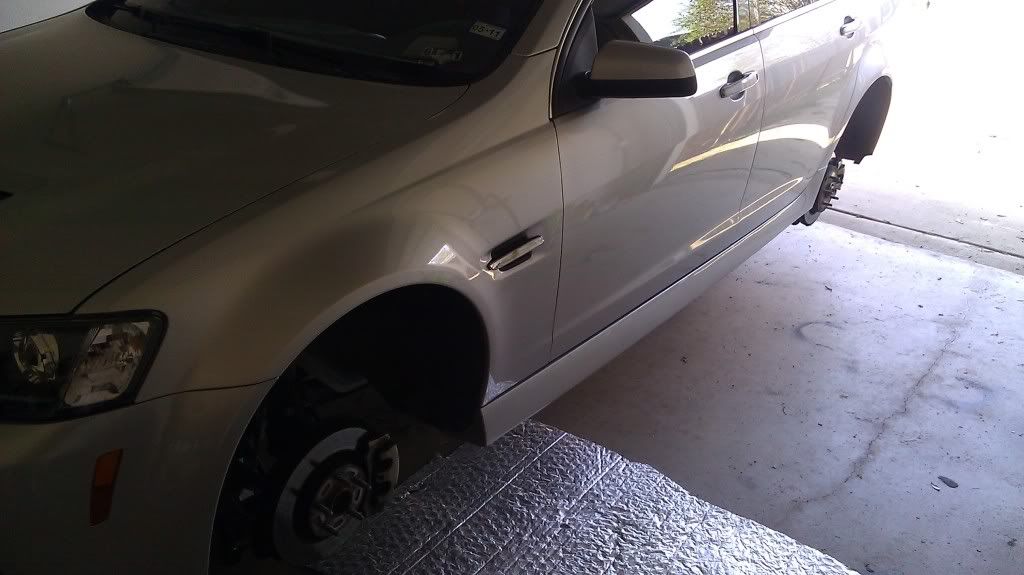
2. Jacked the car up and removed the rims. Used a 3 ton floor jack and four 3 ton jack stands.
![Image]()
3. Thoroughly clean rims with dish detergent (because of its degreasing properties):
![Image]()
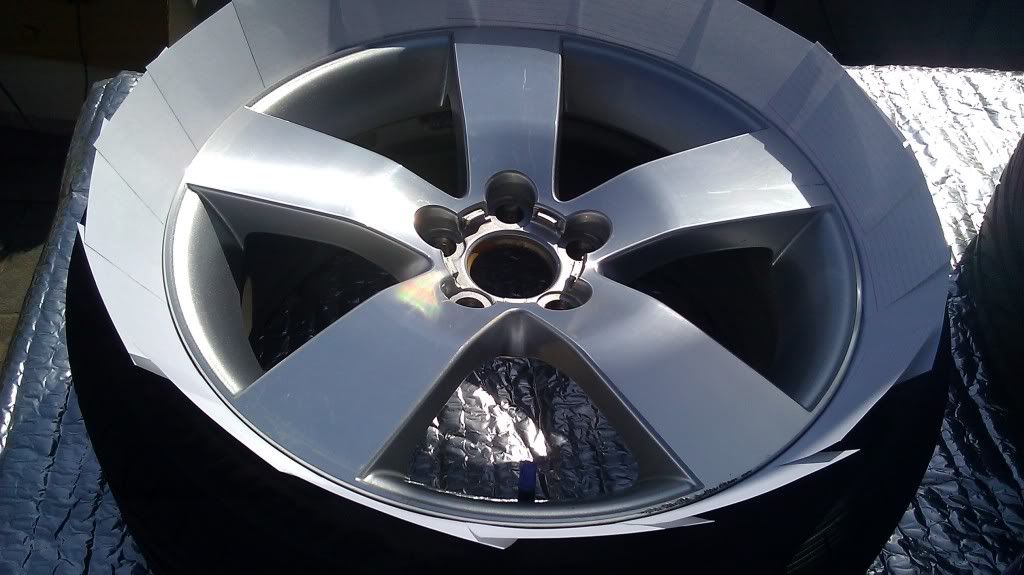
4. IMPORTANT step: Place index cards around the rim to protect the tires. This is MUCH easier than tape. Plasti Dip is a rubberized compound. If you apply tape and do not take it off right away, the plasti will bond to the tape and could peel off of your rim when you remove it. Put painters masking tape over the valve stems!
![Image]()
5. Spray the base coat. Don't be discouraged. The first coat looks terrible. This is the first of four coats. NOTE: When spraying, hold the can approximately 6-8" away from the rim. Use even strokes, and don't linger in one place. Sticking to this method will ensure drip free results.
![Image]()
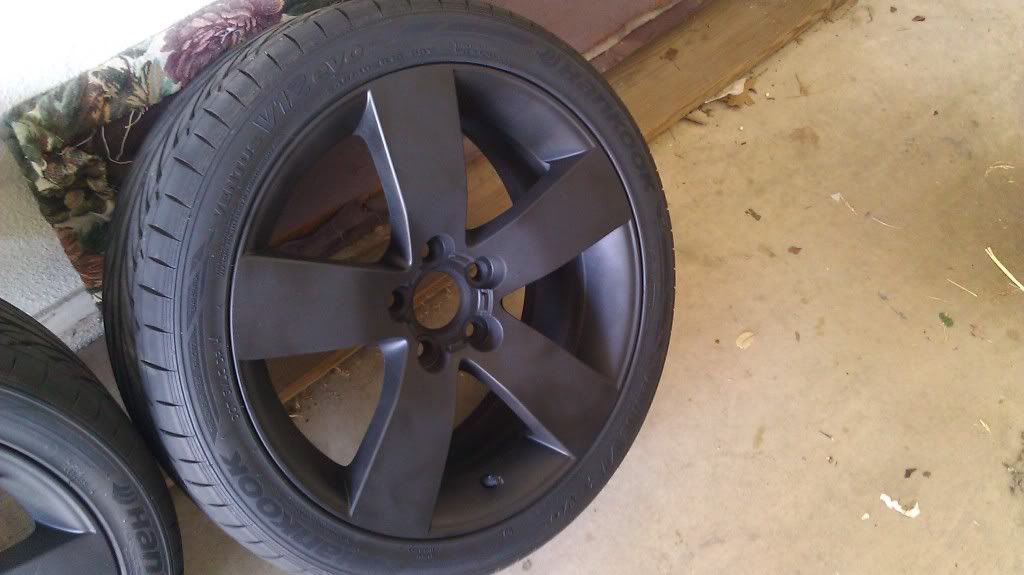
6. After four coats, still a bit mottled because it needs to cure for another 2 hours.
![Image]()
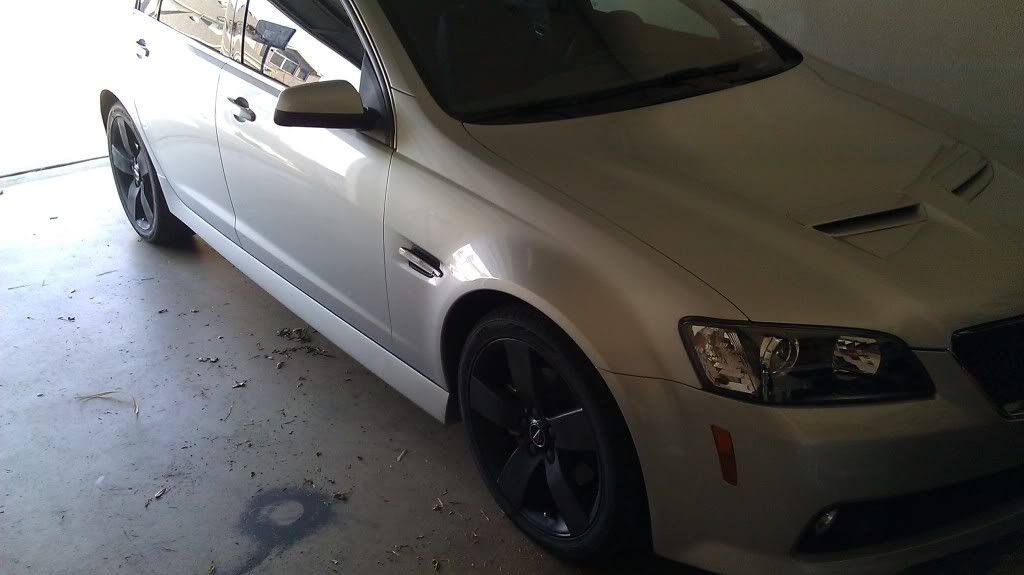
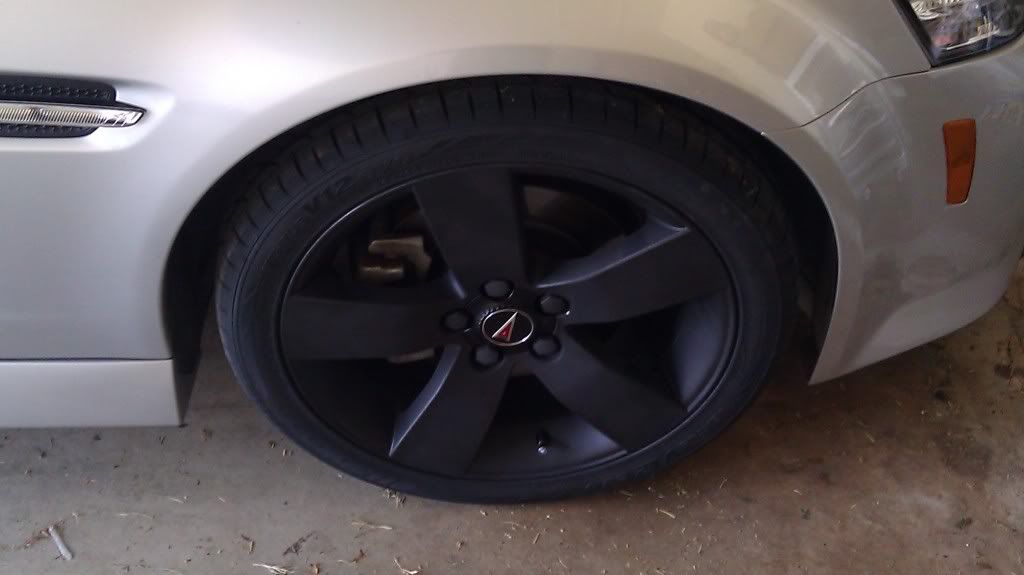
7. All finished. Mounted on the GT, down on the ground, ready to roll tomorrow (want to let it cure all night).
![Image]()
![Image]()
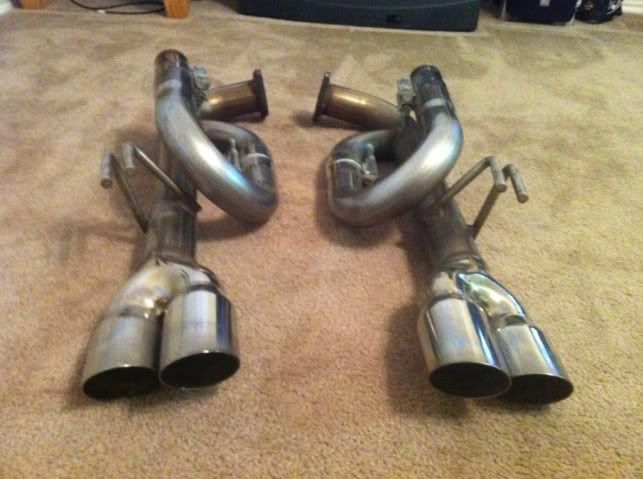
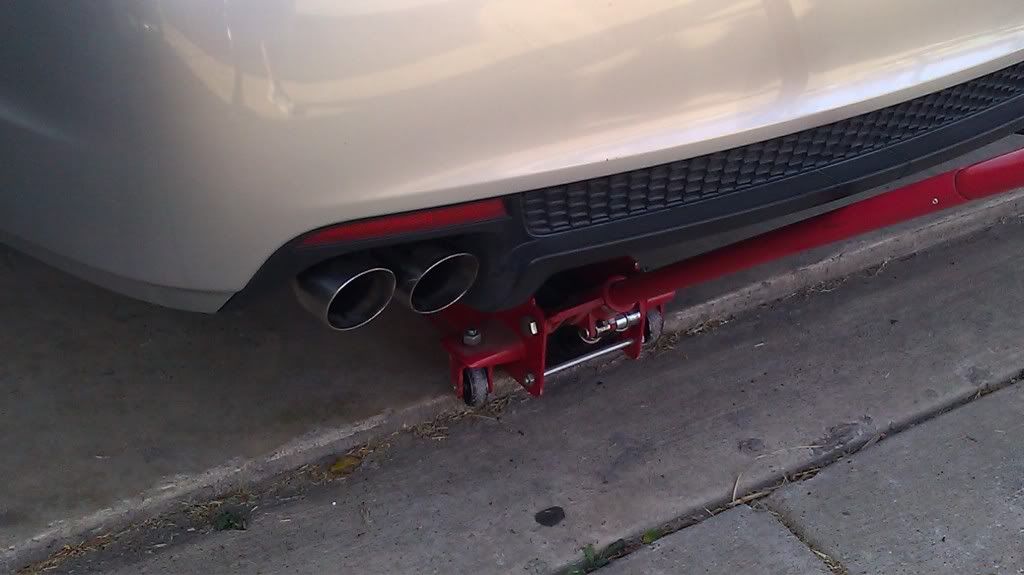
8. Finally: Install a Solo Axel Back system on your car while it is on jack stands. This takes about 15 minutes, totally A W E S O M E!
![Image]()
![Image]()
Other Plasti Dip adopters will attest that this product is very durable. Here is a rundown and pictorial:
1. Home Depot/Lowes/Ace: I used four cans of aerosol flat black Plasti Dip. Total cost: $26.00 for all four cans, and 1$ for two packages of index cards.
2. Jacked the car up and removed the rims. Used a 3 ton floor jack and four 3 ton jack stands.
3. Thoroughly clean rims with dish detergent (because of its degreasing properties):
4. IMPORTANT step: Place index cards around the rim to protect the tires. This is MUCH easier than tape. Plasti Dip is a rubberized compound. If you apply tape and do not take it off right away, the plasti will bond to the tape and could peel off of your rim when you remove it. Put painters masking tape over the valve stems!
5. Spray the base coat. Don't be discouraged. The first coat looks terrible. This is the first of four coats. NOTE: When spraying, hold the can approximately 6-8" away from the rim. Use even strokes, and don't linger in one place. Sticking to this method will ensure drip free results.
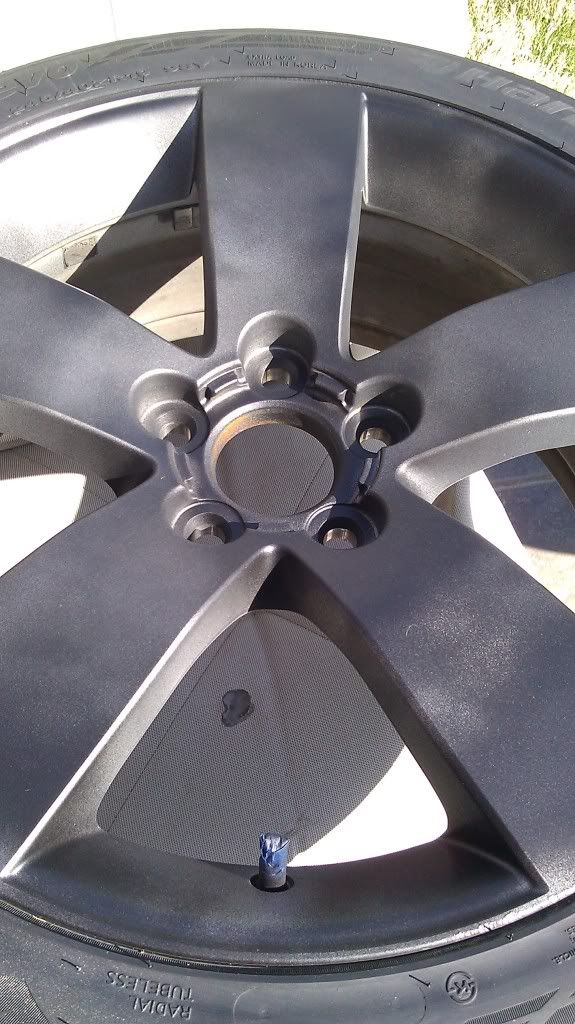
6. After four coats, still a bit mottled because it needs to cure for another 2 hours.
7. All finished. Mounted on the GT, down on the ground, ready to roll tomorrow (want to let it cure all night).
8. Finally: Install a Solo Axel Back system on your car while it is on jack stands. This takes about 15 minutes, totally A W E S O M E!
")